
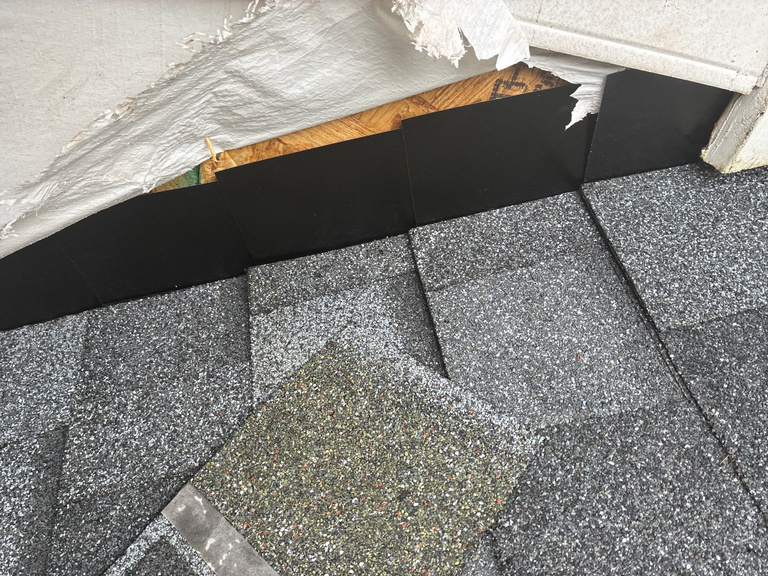
Flashing Replacement or Repair: Catch Leaks Before They Spread
Roofing Done Right the First Time.
We check the flashing at every chimney, valley, and wall intersection before we tell you if it needs a patch or a full replacement run.
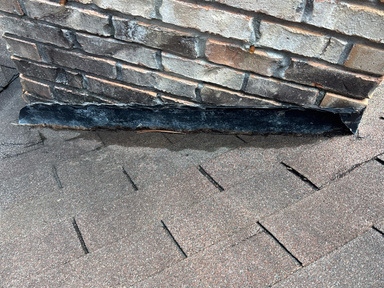
Signs Your Roof Flashing Is Failing
Failing flashing rarely announces itself with a leak right away. It shows up first as small rust streaks, a loose seam, or a water stain after a hard summer storm. Catching these signs early keeps a flashing repair from turning into a decking replacement.
So what does bad flashing look like? Not always a leak. Sometimes it's a thin brown line running down the siding under a valley, or nail heads poking up where they shouldn't. We check flashing on almost every inspection we run. Damage often starts small and gets ignored.
- Rust streaks or dark stains below chimneys, skylights, or roof valleys
- Metal that's visibly lifted, bent, or pulled away from the roof deck
- Cracked or missing sealant around brick and stucco counter flashing
- Water marks on interior ceilings near exterior walls or chimneys
- Granules or shingle debris collecting where flashing meets the roof plane
- Daylight visible around pipe boots or vent flashing from the attic
Attic checks matter too. Climb up there on a bright day. Look for pinholes of light around vent stacks or the chimney chase. That's flashing telling you it's done its job for the last time.
Homes with mature pine tree cover can see a specific pattern. Pine straw builds up in valleys and holds moisture against the metal. This speeds up corrosion on standard step flashing. A stain that shows up every time it rains hard isn't a coincidence, it's a location.
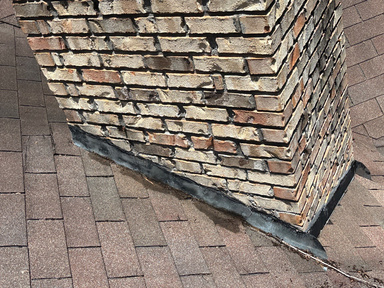
When Flashing Repair Isn't the Right Call
Not every leak needs a flashing repair. Sometimes it does need one, but repairing the flashing alone won't fix the problem.
If the decking under the flashing has already gone soft, patching the metal on top is just covering rot. We've pulled up flashing that looked fine from the ground, only to find plywood underneath you could push a finger through. The flashing wasn't the failure, it was the messenger. Fixing it without addressing the decking just buys you a few more months before the same spot fails again.
Same goes for a roof where flashing has failed in five or six spots at once. That's not a flashing problem anymore. That's usually a sign the whole roof system is aging out. Spot repairs turn into a pattern of chasing leaks one at a time.
- A small gap in caulking around a vent boot with no signs of water inside
- Cosmetic rust on flashing that's still sealed tight and holding
- One isolated soft spot on a roof that's otherwise in good shape from a recent inspection
Those are cases where waiting, or a much smaller fix, makes more sense than a full flashing job. We'd rather tell you that straight than talk you into work you don't need yet. If your roof is already near the end of its expected life, flashing repair might just delay a bigger decision. So it's worth asking directly: is this a patch, or a preview of what's coming next?
Keep your roof seams sealed
Roof flashing creates a watertight barrier around vulnerable seams, like chimneys, skylights, valleys, and wall intersections. Over time, metal flashing can rust, pull away, or break its seal, giving water a direct path into your attic, walls, and ceiling. Keep your roof seams sealed tight with our 30-Point Roof Inspection.
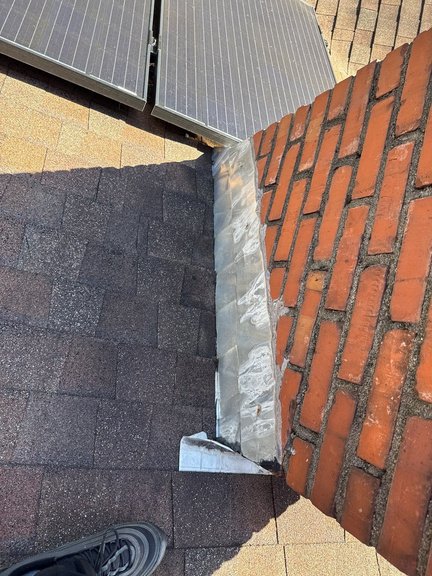
- Detailed Written EstimateClear, itemized pricing covering flashing resealing, section repairs, or complete replacements.
- Photo Proof & DocumentationHigh-resolution photos showing lifted metal, rusted areas, cracked sealant, or hidden leak points around your roof penetrations.
- In-Person Expert ConsultationOur specialist reviews the condition of your flashing and recommends the most durable, long-lasting repair or replacement solution.
Protect your roof seams. Prevent costly hidden water damage.
Book My Free Inspection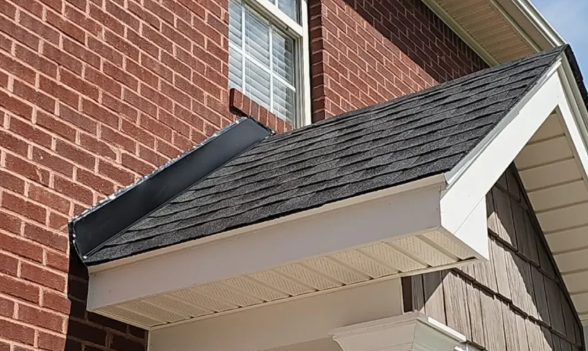
How Flashing Repair Costs Are Typically Structured
Flashing work is rarely priced as a single flat rate. Every roof has a different number of penetrations, valleys, and transitions. Most licensed roofers price flashing jobs by linear footage for runs like roof-to-wall or valley flashing, and by the unit for individual penetrations such as chimneys, plumbing vents, and skylights. This structure means two houses with similar square footage can receive very different quotes depending on how many transitions and penetrations exist on the roof.
Several factors influence where a quote lands within that structure. Roof pitch and accessibility matter in a mix of one-story ranch homes and steeper rooflines. Steep or hard-to-reach areas require additional safety equipment and labor time. The flashing material itself also plays a role. Galvanized steel, aluminum, and copper have different material costs, weights, and installation requirements, with copper typically requiring more specialized labor.
The biggest variable is what a contractor finds once the old flashing is removed. Rotted decking or water-damaged fascia hidden beneath flashing is common on older homes with mature tree canopy. This discovery can change the scope of work after the job has already started. Whether the flashing repair is a standalone project or bundled into a full reroof affects pricing. Labor and material costs are often more efficient when flashing is replaced alongside a complete roof replacement rather than as an isolated repair visit.
- Ask whether the quote covers a full flashing run replacement or a partial repair of just the damaged section
- Ask how the contractor handles pricing if rot or damaged decking is discovered after the old flashing is removed
- Ask whether the quote is itemized by section and material or presented as a single lump-sum price
- Ask if the flashing material specified matches or upgrades what is currently on the roof
- Ask whether bundling the flashing work with other roof repairs would reduce the overall cost
Getting clear answers to these questions before work begins helps homeowners compare quotes accurately and avoid surprise charges mid-project. An itemized quote makes it easier to see exactly what is being charged for material, labor, and any contingency work tied to hidden damage.
Storm Season Drives Flashing Damage
Severe thunderstorm seasons can be especially hard on roof flashing. Storms bring straight-line winds, hail, and torrential downpours that hit roofs hard and fast. Unlike climates where slow freeze-thaw cycling gradually works flashing loose over years, storm-prone areas can experience damage in sudden, violent bursts. A single afternoon storm can lift step flashing along a dormer, shift a pipe boot out of position, or drive wind-blown rain sideways under flashing laps that were sealed just fine the week before.
This pattern is why flashing failure can look different from failure in colder regions. Instead of slow metal fatigue from repeated expansion and contraction, roofs can experience mechanical shock. Wind gusts during a thunderstorm can pry up the edge of step flashing at a chimney or sidewall. Hail impacts can dent or crack the rubber collar on a pipe boot, creating a gap that goes unnoticed until the next heavy rain finds it. The damage often happens in one event rather than building gradually. It can go from watertight to leaking in a single storm cycle.
Age compounds the risk. Many older homes still carry original galvanized steel flashing. That material typically holds up well for two to three decades. Plenty of these installations are now well past that window. Zinc coatings are worn thin, and rust is already forming at seams and fasteners. Flashing in that condition has far less flexibility and holding strength, so it's more easily loosened or torn during a strong storm than flashing installed in the last ten years.
- Check attic sheathing near chimneys, skylights, and sidewalls for fresh water stains after any strong storm
- Look from the ground for step flashing pieces that appear lifted, bent, or missing along roof-to-wall joints
- Inspect visible pipe boots for cracked rubber collars or boots knocked out of alignment
- Note any granule buildup in gutters near flashing points, which can signal impact damage from hail
- Watch for rust streaks running down siding or brick below flashing seams
Given this combination of storm-driven mechanical stress and aging galvanized materials, waiting for a routine annual or seasonal roof check is not always the best strategy. A smarter approach is a post-storm inspection scheduled within days of any severe weather event, before a hidden gap turns into a ceiling stain or attic moisture problem.
Thinking about flashing repair?
Let's talk. We'll check every chimney, valley, and wall intersection, then tell you what it actually needs.
Book My Free Inspection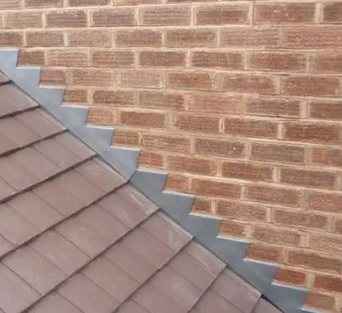
What happens during a flashing inspection and repair
A proper flashing inspection starts on the ground with binoculars and ends on the roof with hands-on probing. A technician walks the roofline looking for lifted metal, rust streaks, cracked sealant, and daylight gaps at wall intersections. Once a suspect area is found, the crew climbs up and physically tests it, lifting shingles or siding to see how far the metal extends and whether it still laps correctly with the roofing material beneath it.
Different flashing types fail in different ways. Identifying which one is compromised drives the entire repair plan. Step flashing along dormers and sidewalls often works loose piece by piece. Counter flashing embedded in brick chimneys can pull away from mortar joints after years of freeze-thaw cycling. Valley flashing wears thin from constant water volume. Pipe boots crack from UV exposure on hot roofs. B-vent flashing around furnace or water heater exhausts rusts out from the inside.
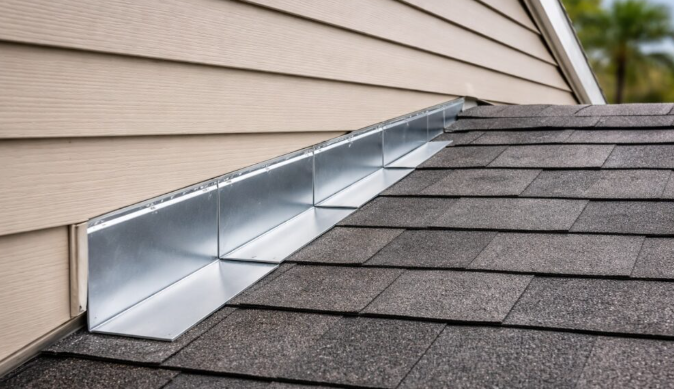
- Step flashing: individual pieces woven with each shingle course along vertical walls
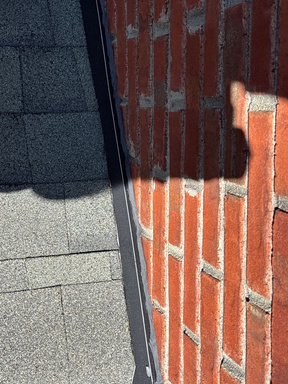
- Counter flashing: embedded into masonry or siding to overlap step flashing
- Valley flashing: channels water where two roof planes meet
- Chimney flashing: combines step, counter, and cricket pieces around masonry
- Pipe boot flashing: rubber or lead collars sealing plumbing vent penetrations
- B-vent flashing: metal collars around furnace and water heater exhaust pipes
Once the failure point is confirmed, the contractor decides between a targeted repair and a full replacement of that flashing run. A written scope of work should come first, before any tools touch the roof. This document spells out exactly which sections get replaced, what material and gauge will be used, and how the new flashing integrates with existing shingles or siding. This is the foundation of an honest repair. It forces a clear decision rather than an on-the-fly patch.
This matters because IRC Section R903.2 requires flashing at every roof-wall intersection and penetration, not a bead of sealant standing in for it. Caulk-only fixes might stop a drip for a season, but they do not meet code intent and typically fail again within a year or two, especially through humid summers and freezing winters.
Inspectors frequently find wood rot in the decking or fascia directly beneath failed flashing. Water has usually been getting in for a while before anyone noticed a stain. This rotted wood needs to be cut out and replaced separately before new flashing goes on. Fastening metal into soft wood will not hold, and the leak will return.
Common questions about flashing replacement or repair
How quickly can you get someone out to look at my flashing?
What happens when your crew comes to check my flashing?
Why does my home keep getting the same roof leak every time it rains hard?
Does flashing repair fix a leak for good, or will it come back?
Can you just caulk around my chimney flashing instead of replacing it?
How do I know if I need a small flashing repair or a full roof replacement?

Metro Atlanta's trusted roofing team. Roof replacement, repair, storm damage restoration and inspections across Cobb County, North Fulton, Atlanta and DeKalb, done right the first time.
© 2026 Shelter Guard Roofing. All Rights Reserved.